The digital hosts config data are saved within the /etc/apache2/sites-available/ directory. The listing already has the 000-default.conf that comes with the Apache installation. It's effective to make use of this default configuration file in case you're solely internet internet hosting one website on this server. In this tutorial, we're solely internet internet hosting one site, so we will comfortably use this file. Notice that you just didn't should supply a password to attach because the basis user, regardless that you just have outlined one when operating the mysql_secure_installation script.
That is since the default authentication methodology for the executive MySQL consumer is unix_socket as opposed to password. In sensible terms, meaning you won't be capable of use the executive database root consumer to attach out of your PHP application. Setting a password for the basis MySQL account works as a safeguard, in case the default authentication methodology is modified from unix_socket to password.

The .htaccess records sit within the basis listing of a website. They comprise regulations that Apache makes use of to direct requests appropriately. WordPress makes use of its .htaccess to control how Apache serves records from its root listing and subsequent subdirectories. Virtual hosts might be useful you host limitless net websites on one server.

To be taught extra about digital hosts, you are able to still take a inspect our tutorial on be taught how to establish Apache Virtual Hosts on Ubuntu 20.04. On a stay server, you are able to still arrange each underneath a sub-domain or a sub-directory. Installing a sub-domain on a neighborhood host is a bit extra technical. It includes configuring the XAMPP software program to create a sub-domain after which registering it within the working system software program files.
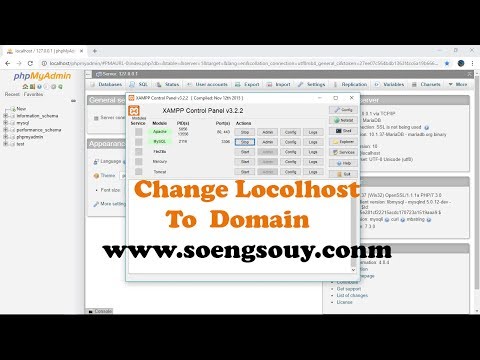
In this post, we'll take care of solely a sub-directory installing on the neighborhood server. XAMPP helps us simulate server atmosphere on our Windows laptop so we will take a look at our net websites regionally earlier than importing them to stay server. By default, XAMPP makes use of localhost as its URL for neighborhood websites. Is it potential to entry our net websites utilizing a customized area identify as opposed to localhost?

By doing so, we will use completely different domains for a number of net websites and we save the time to vary net website URL on distant server when our net website is capable to publish. You have Apache established to serve your content material material and MySQL established to shop and manage your data. PHP is the part of our setup which will course of code to show dynamic content material material to the ultimate user. In addition to the php package, you'll want php-mysql, a PHP module that permits PHP to speak with MySQL-based databases. You'll additionally want libapache2-mod-php to permit Apache to manage PHP files.

Core PHP packages will mechanically be mounted as dependencies. You have efficiently hosted two net websites on a single server three diverse ways. You can now simply host extra net websites with the Apache digital internet hosting method. If you're able to begin configuring a number of net websites on an Apache VPS, take a look at Atlantic.Net's VPS Hosting options. When employing the Apache net server, you can still create digital hosts to encapsulate configuration particulars and host a number of area from a single server. In this guide, we'll arrange a webpage referred to as your_domain, however you ought to substitute this together with your personal area name.
It will make definite that every new nearby growth area will work out of the field in your desktop and also you won't must edit hosts and httpd-vhosts.conf information every time. This is achieved by establishing wildcard digital hosts and DNS. If you're going with a sub-domain community on a reside server, you'll must acquire a factor referred to as a wild card DNS out of your internet hosting service provider.
Since, we're solely doing a sub-directory set up on a neighborhood server, you don't want any permissions. A multisite is a community of two or extra websites that function off a single WordPress install. All the websites on a multisite setup will use the identical WP database, WP listing and WP configuration file.

In such a setup, the administration of the WordPress deploy is within the palms of a "Network Administrator". And the administration of the person websites on the community is left to the care of the respective Site Admins. Also observe that this information assumes, you are putting in Joomla! In a single internet hosting environment, operating PHP as module. By default, LAMP packaged by Bitnami contains operating Apache and MariaDB servers, and all of the packages that embrace the stack can be found within the /opt/bitnami directory. Your first step ought to be to create a phpinfo.php file within the Apache net server root at /opt/bitnami/apache2/htdocs listing to confirm PHP's capabilities.

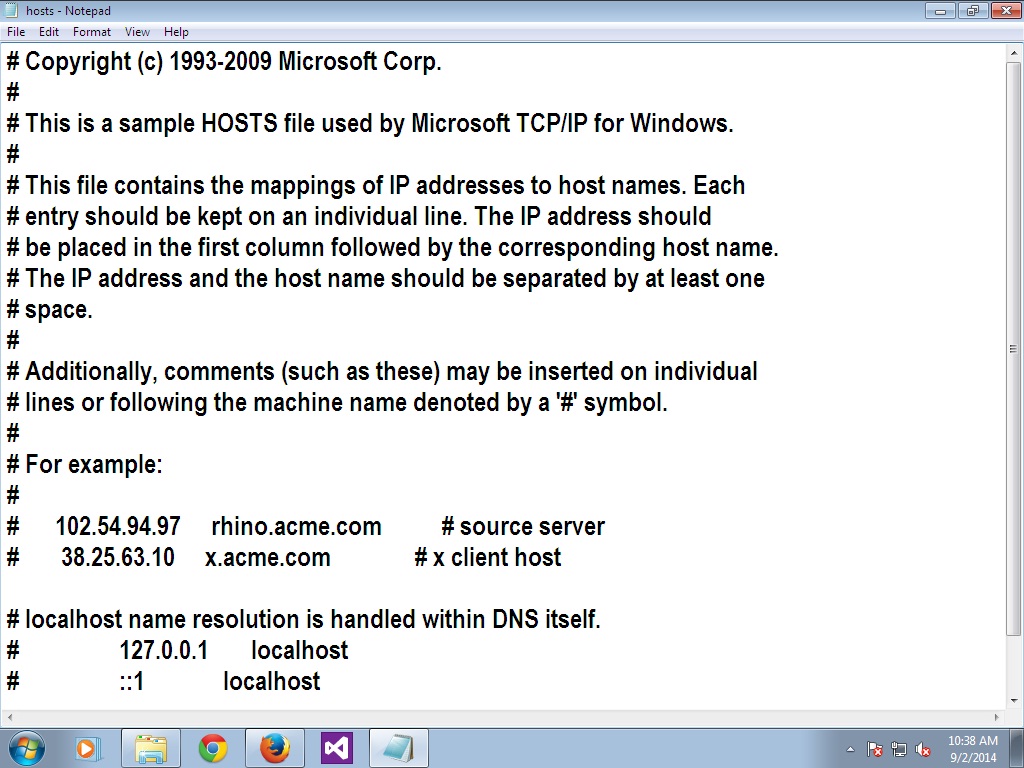
This tutorial will instruction you thru establishing a number of domains and net websites making use of Apache digital hosts on an Ubuntu 18.04 server. Enable digital hosts in apache configuration file Create the information Add the host to /etc/hosts Add the host to /opt/lampp/etc/extra/httpdvhosts.conf Test! The hosts file on a linux system is used to map ip addresses to special host names. We can conveniently create a number of sub domains in right here and level them to the localhost ip address. Once the configuration file is written, it's as much as you to decide on a conference for username and password to mysql for every WordPress database instance. This documentation exhibits solely one, localhost, example.
Virtual hosts enable us to make use of aliases to run a number of net websites on the identical IP handle and net server. The excellent information is that the performance is built-in; all we have to do is enable it after which create the digital hosts we need. XAMPP is utilized by many WordPress directors to establish WordPress environments. While there are lots of totally different case uses, a number of essentially the most typical use instances are to establish a staging, growth or testing environment. As a particularly configurable environment, XAMPP presents many advantages, consisting of the power to establish a number of WordPress websites as a result of digital hosts.
If you can't discover the .htaccess file, make convinced that to allow show hidden records settings in your computer. If you continue to can't discover it, then create one within the identical listing as your wp-config.php file. Since we setup a neighborhood repository within the past step, you'll copy it to your webroot after any updates and making changes.

Having your nearby repository outdoors of the webroot, like we've got in /opt, it is possible for you to to organize and stage your upgrades in a extra useful manner. For example, you could have the desire to make some alterations or add some plug-ins, you'd obtain the plugin and replica it to your nearby moodle repository. After you could have added the plug-in and another alterations you may need made you'll have to edit the file situated in /opt/moodle/.git/info/exclude. Within that file you should inform git which files/folders to exclude when it pulls down the updates while you run your subsequent "sudo git pull". An instance entry can be the certificates mod situated in /opt/moodle/mod/certificate so inside the exclude file you should add "/mod/certificate" under the final comments.
You would add further entries, 1 per line, for every plug-in or file you may need changed. If I have been to vary the favicon.ico file you'd simply add "favicon.ico" to the exclude file. Now once you run "sudo git pull" to replace moodle to the newest edition it's going to ignore these information and directories and simply replace the core moodle code. Before copying to your webroot to improve you have the desire to ensure and obtain and replica over the newest variations of the plug-ins you may need added. Port-based digital internet hosting is a technique to serve totally different net websites elegant on the port number.
You can assign a separate port wide variety for every internet website on a single server with a single IP address. Next, you have to to create an Apache digital host configuration file to serve equally websites. Name-based digital internet internet hosting is the mostly used system to host a wide variety of net websites on the identical IP handle and Port. You will want legitimate domains to host a wide variety of net websites employing name-based digital hosting.

Regardless of whether or not you selected to establish the VALIDATE PASSWORD PLUGIN, your server will subsequent ask you to pick and ensure a password for the MySQL root user. The database root consumer is an administrative consumer with full privileges over the database system. In this VirtualHost configuration file, you could see the VirtualHost instance code. You can copy and paste the pattern code after which exchange the ServerName together with your personal area name. XAMPP makes it straightforward to put in all the things we have to construct a WordPress staging setting in a single straightforward package.
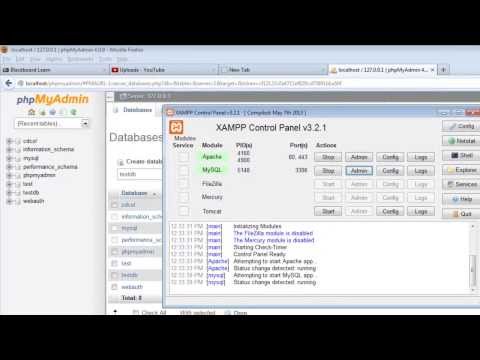
Click on the Admin button of your Apache server to go to the online handle of your internet server. The Control Panel will now commence in your commonplace browser, and you'll be led to the dashboard of your XAMPP's neighborhood host. Alternatively, you will attain the dashboard because of localhost/dashboard/. The localhost is used to entry the community services, resembling directory, database, email, files, printers, which might be operating on the host by way of the loopback community interface. IP-based digital internet hosting is a technique to serve completely different internet websites centered on IP address. You can assign a separate IP handle for every internet internet internet site on a single server.
Change to your XAMPP set up listing characteristically /opt/lampp and open the The second block units up a digital host named wordpress.localhost. By default xampp in ubuntu will not use the httpdvhosts.conf file the situation of the digital hosts as a consequence we have to point that this file will. Browse to the set up listing of XAMPP in Windows File Explorer.

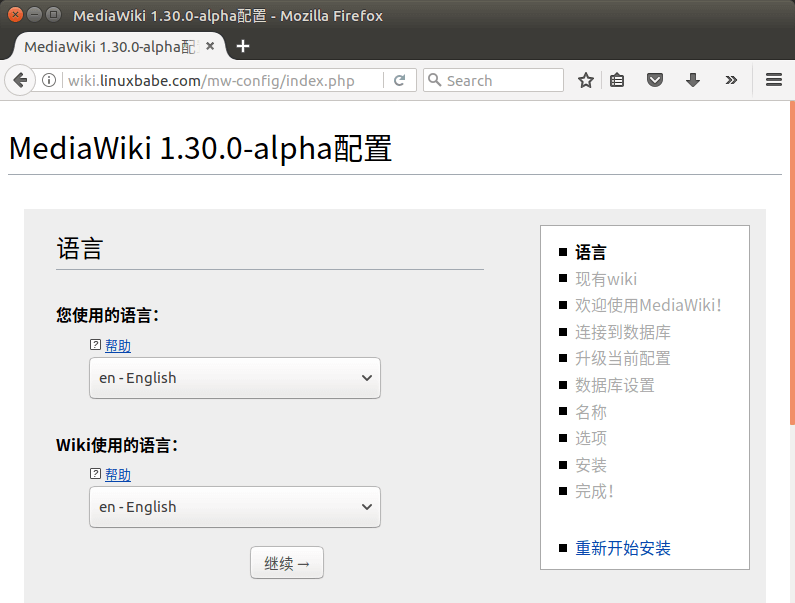
Find and open the Virtual Hosts Apache configuration file named httpd-vhosts.conf employing Notepad or different textual content editor packages you have. In ubuntu, the nearby server by default is referred by the identify "localhost". However, you may as well create a customized area identify for you nearby server in preference to employing localhost. This article explains the method to create your personal customized area identify in preference to employing localhost.

Here 'hackdx.md' is created as our domain, which might be taken as per need. Before accessing the net front-end administration panel, you want to regulate a couple of settings. Those contain the listing possession permissions, and database consumer credentials. Then, sort the basis password you set when putting in MySQL, the very first time, and hit enter to log in.

After that, create a database that WordPress will control. You can select any identify for the database, however for the sake of this tutorial, we'll name it wordpress. Open the configuration file with any textual content editor comparable to Notepad, and edit the digital host for port 443. If you're logged in to phpMyAdmin, you may additionally import the database schema out of your native XAMPP system. However, to make use of it, you should first join your Google Cloud Platform and Bitnami accounts.
For a multi-user installation, set this parameter to the identify of your central database containing the phpMyAdmin configuration storage. You can use the Admin button of your database module to open phpMyAdmin. Here, you'll handle the databases of your net tasks that you're testing in your XAMPP. Alternatively, you'll attain the administration part of your MySQL database by way of localhost/phpmyadmin/. Apache on Ubuntu 20.04 has one server block enabled by default that's configured to serve paperwork from the /var/ directory. While this works properly for a single site, it could grow to be unwieldy if you're internet hosting a number of sites.
How to setup a Virtual Host regionally with XAMPP in Ubuntu Allow the utilization of the vhosts.conf file modifying the httpd.conf file. To entry xampp website it's important to write down localhost/projectdirectory in your browser.In this weblog we're going to exchange that together with your customized area like- project.dev . In this example, we're modifying the primary 000-default configuration file. Alternatively possible create separate configuration records in sites-available listing after which symlink them to the sites-enabled directory, or making use of the a2ensite command. Often times, in that listing is a few sort of administration console in your server / mysql / php / perl installation. Web websites are often mounted into subdirectories, this is often the reason it is advisable sort localhost/mysite in preference to simply localhost.

The digital hosts setup is required to redirect the URL to the sub-directory internet hosting your site. For example, your website could be situated in /htdocs/mysite/…. This observe making use of XAMPP is useful while you desire to simulate a manufacturing setting regionally accessing to your challenge by a traditional URL within the browser.

If you want to entry the identical website employing localhost on the identical time, add under code to this configuration file. Make bound to exchange the DocumentRoot together with your own. Now you will have already pointed the customized area to your nearby net server. Follow under steps to map the area to the precise folder for the nearby net websites configured employing XAMPP.
This tutorial requires you to have an Ubuntu 20.04 installation. You can comfortably deploy your server by following our tutorial on establishing an Ubuntu server. First, log in to your Ubuntu 20.04 server and create a sudo user.
This is the consumer we'll be utilizing to put in the required packages and program as we go together with this tutorial. WordPress is undoubtedly the preferred Content Management System. You can host about whatever on WordPress- from user-friendly portfolio websites, enterprise touchdown pages, and blogs to full-fledged eCommerce websites. It ensures flexibility, robustness, and security, that are key for the success of any website.
Downloading and putting in WordPress is straightforward. Then, after you have got mounted it in your server, a lot of the administration duties could be accomplished from the online frontend. WordPress requires a mixture of software program elements to run.

These program constituents on the whole come collectively to type a stack. In this tutorial, we'll be specializing in making use of the LAMP stack to run our WordPress site. This tutorial assumes you could have MySQL and Apache mounted . If you employ MAMP, use it as you like, however this tutorial goals for a built-in Apache & MySQL setup. You can discover further details about the place MAMP shops its config information on this article. For some services, the net server additionally exposes surroundings variables understood by CLI equipment associated to the service.